Last year I made my son, M, a rather complex Thomas the Tank Engine cake for his birthday. You can get more info and instruction for Thomas here: https://imnotstalkingyou.com/2012/11/27/beginners-luck-the-post-with-the-thomas-cake/

My finished Thomas The Tank Engine cake
I did a month of preparation for it (planning, shopping, baking, freezing, studying Cake Boss episodes). My son still remembers the cake because pictures of it keep circulating on my digital picture frame.
I started asking him a couple of months ago what kind of cake he wanted this year. First he told me “a Creeper cake” (from Scooby-Doo).

The Creeper from Scooby-Doo
I told him no. Beyond my skill level and too scary.
Then he fell in love with the story “The Little Red Caboose” by Marian Potter. Then all he wanted was a caboose cake. Last year was the beginning of the train, this year the end. A caboose is pretty much a rectangle. I could handle that.

My inspiration: The Little Red Caboose by Marian Potter
I had two goals with this cake, which greatly affected the outcome:
1. Make it taste better than the Thomas cake.
Thomas was all about the looks. I used fondant and butter cream frosting to make him look awesome. I wasn’t crazy about the taste of either of them. This year I vowed to use regular old in-the-can Duncan Hines frosting, no matter what the impact on my finished creation would be.
Thomas was made with two boxes of cake mix. The caboose is only made from one box. I used yummy strawberry cake and layered it with chocolate frosting. I covered the outside with colored vanilla frosting.
2. Do not be stressed out.
Well, I was a little. I only had like 2 1/2 hours to assemble the cake on the morning of my son’s birthday. But that was only like one day’s worth of stress compared to last year’s weeks worth of so much anxiety I couldn’t sleep. When I made the Thomas cake, I wasn’t working. I had plenty of time to plan cakes and worry last year. Not so much this year.
So, when you judge the result of my efforts, take those two things into consideration.
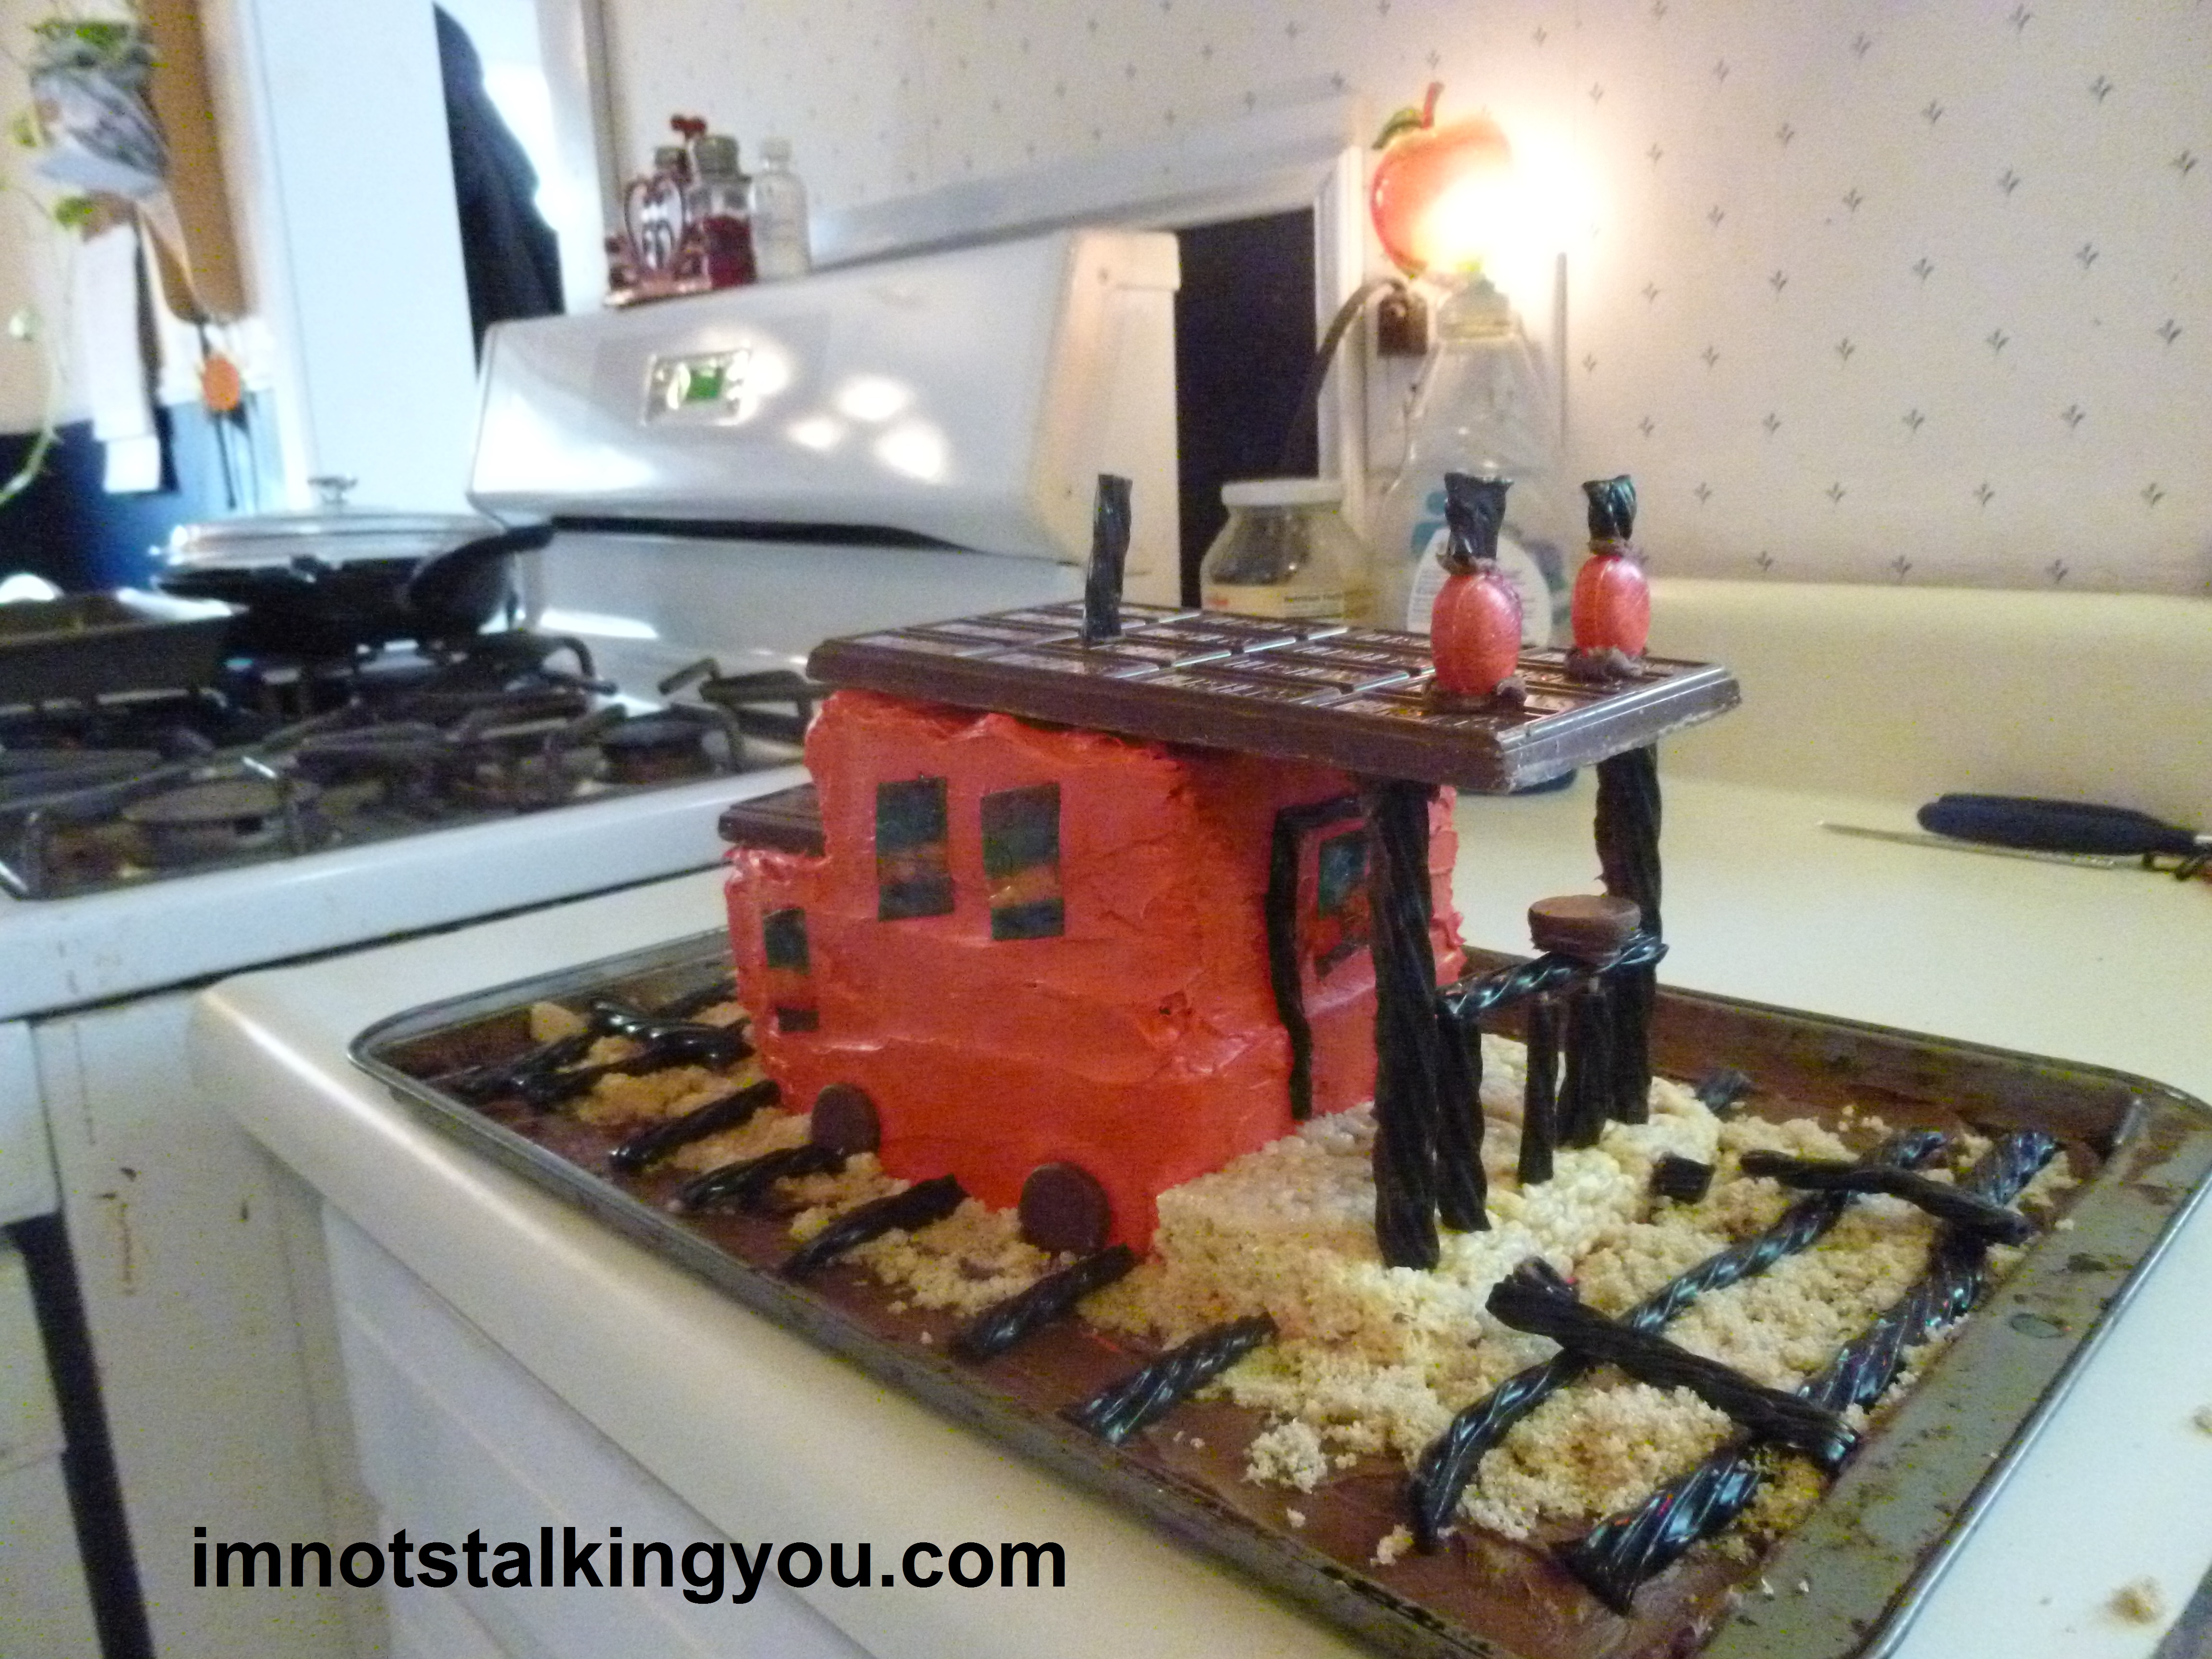
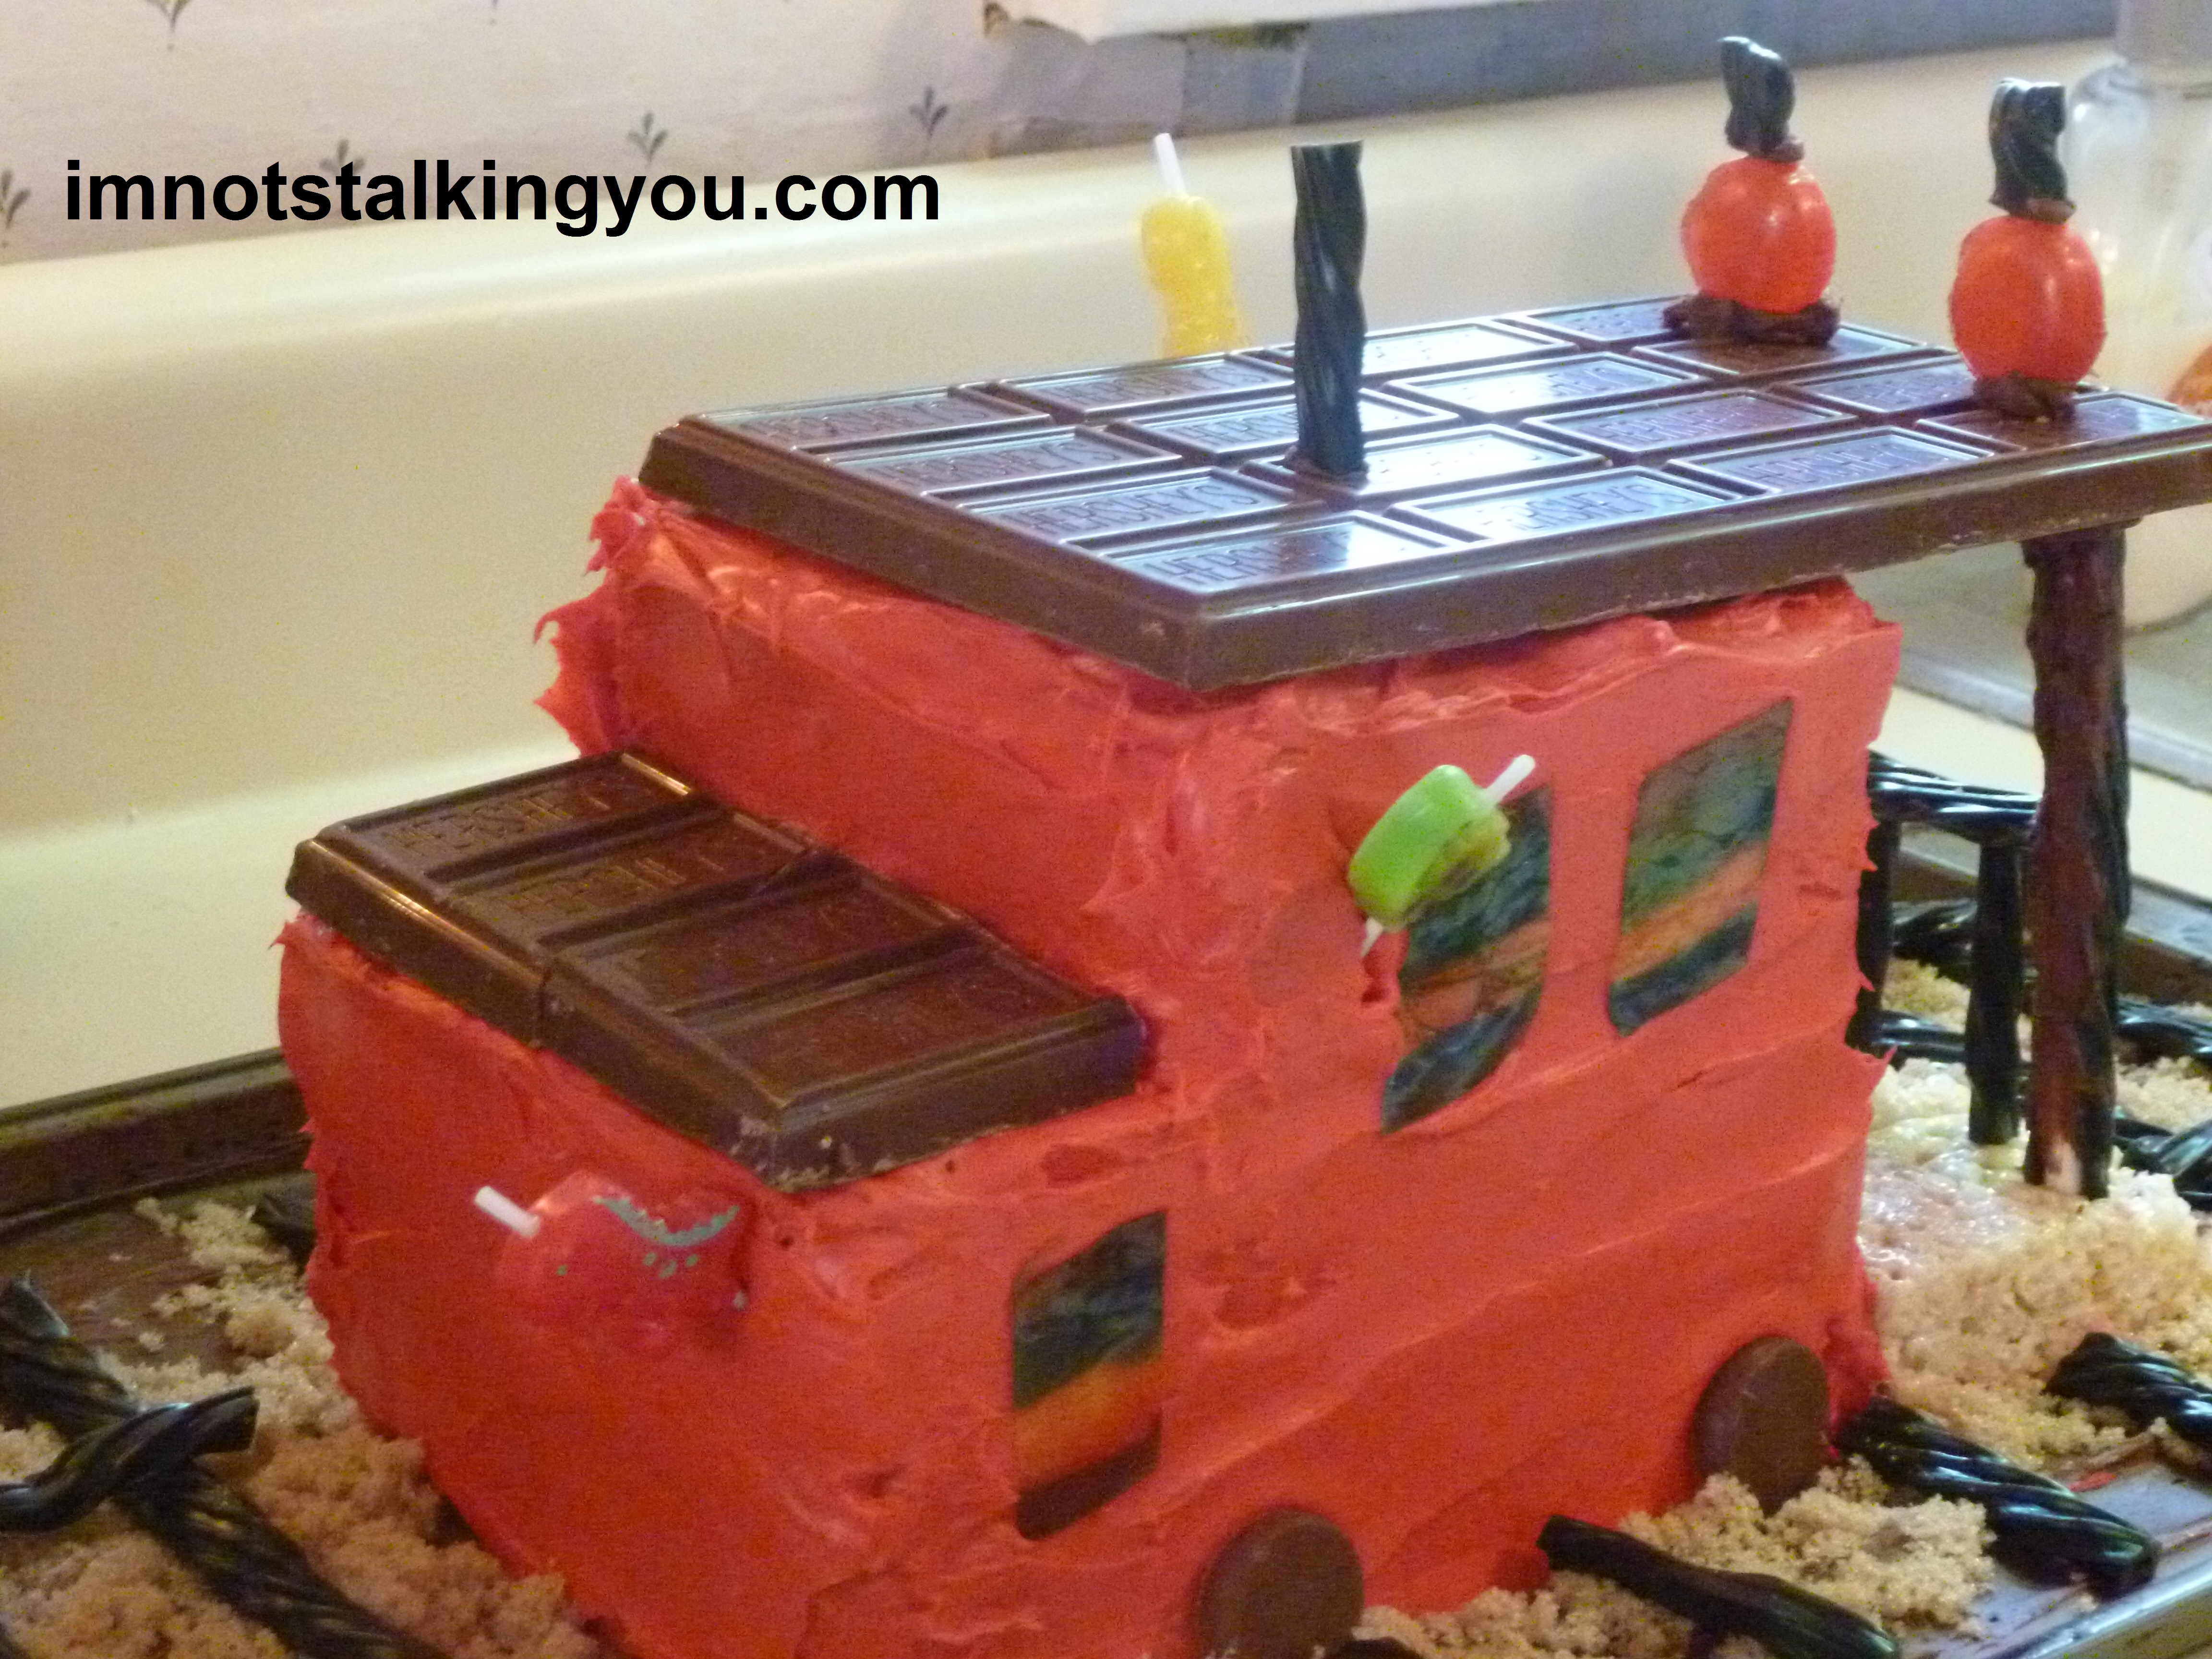
I present to you, my caboose cake!

My Caboose Cake!
It could put a diabetic in a coma!
It is complete with smoke stack, buffers, and a brake wheel (the brake wheel is important in the story).
It…looks a little like a houseboat???
I was way too far into my hasty assembly and decorating before I realized that I had forgotten to make another lower level for the back.
But look at the fine details of the railing! The door! The windows!
I think I should at least get credit for trying. My asbestos friend said she would not even attempt such a thing. (Which is silly, because I have seen her make an adorable Stitch costume in one night. Creativity flows from one medium to another. Except music. I can’t make music to save my life.)
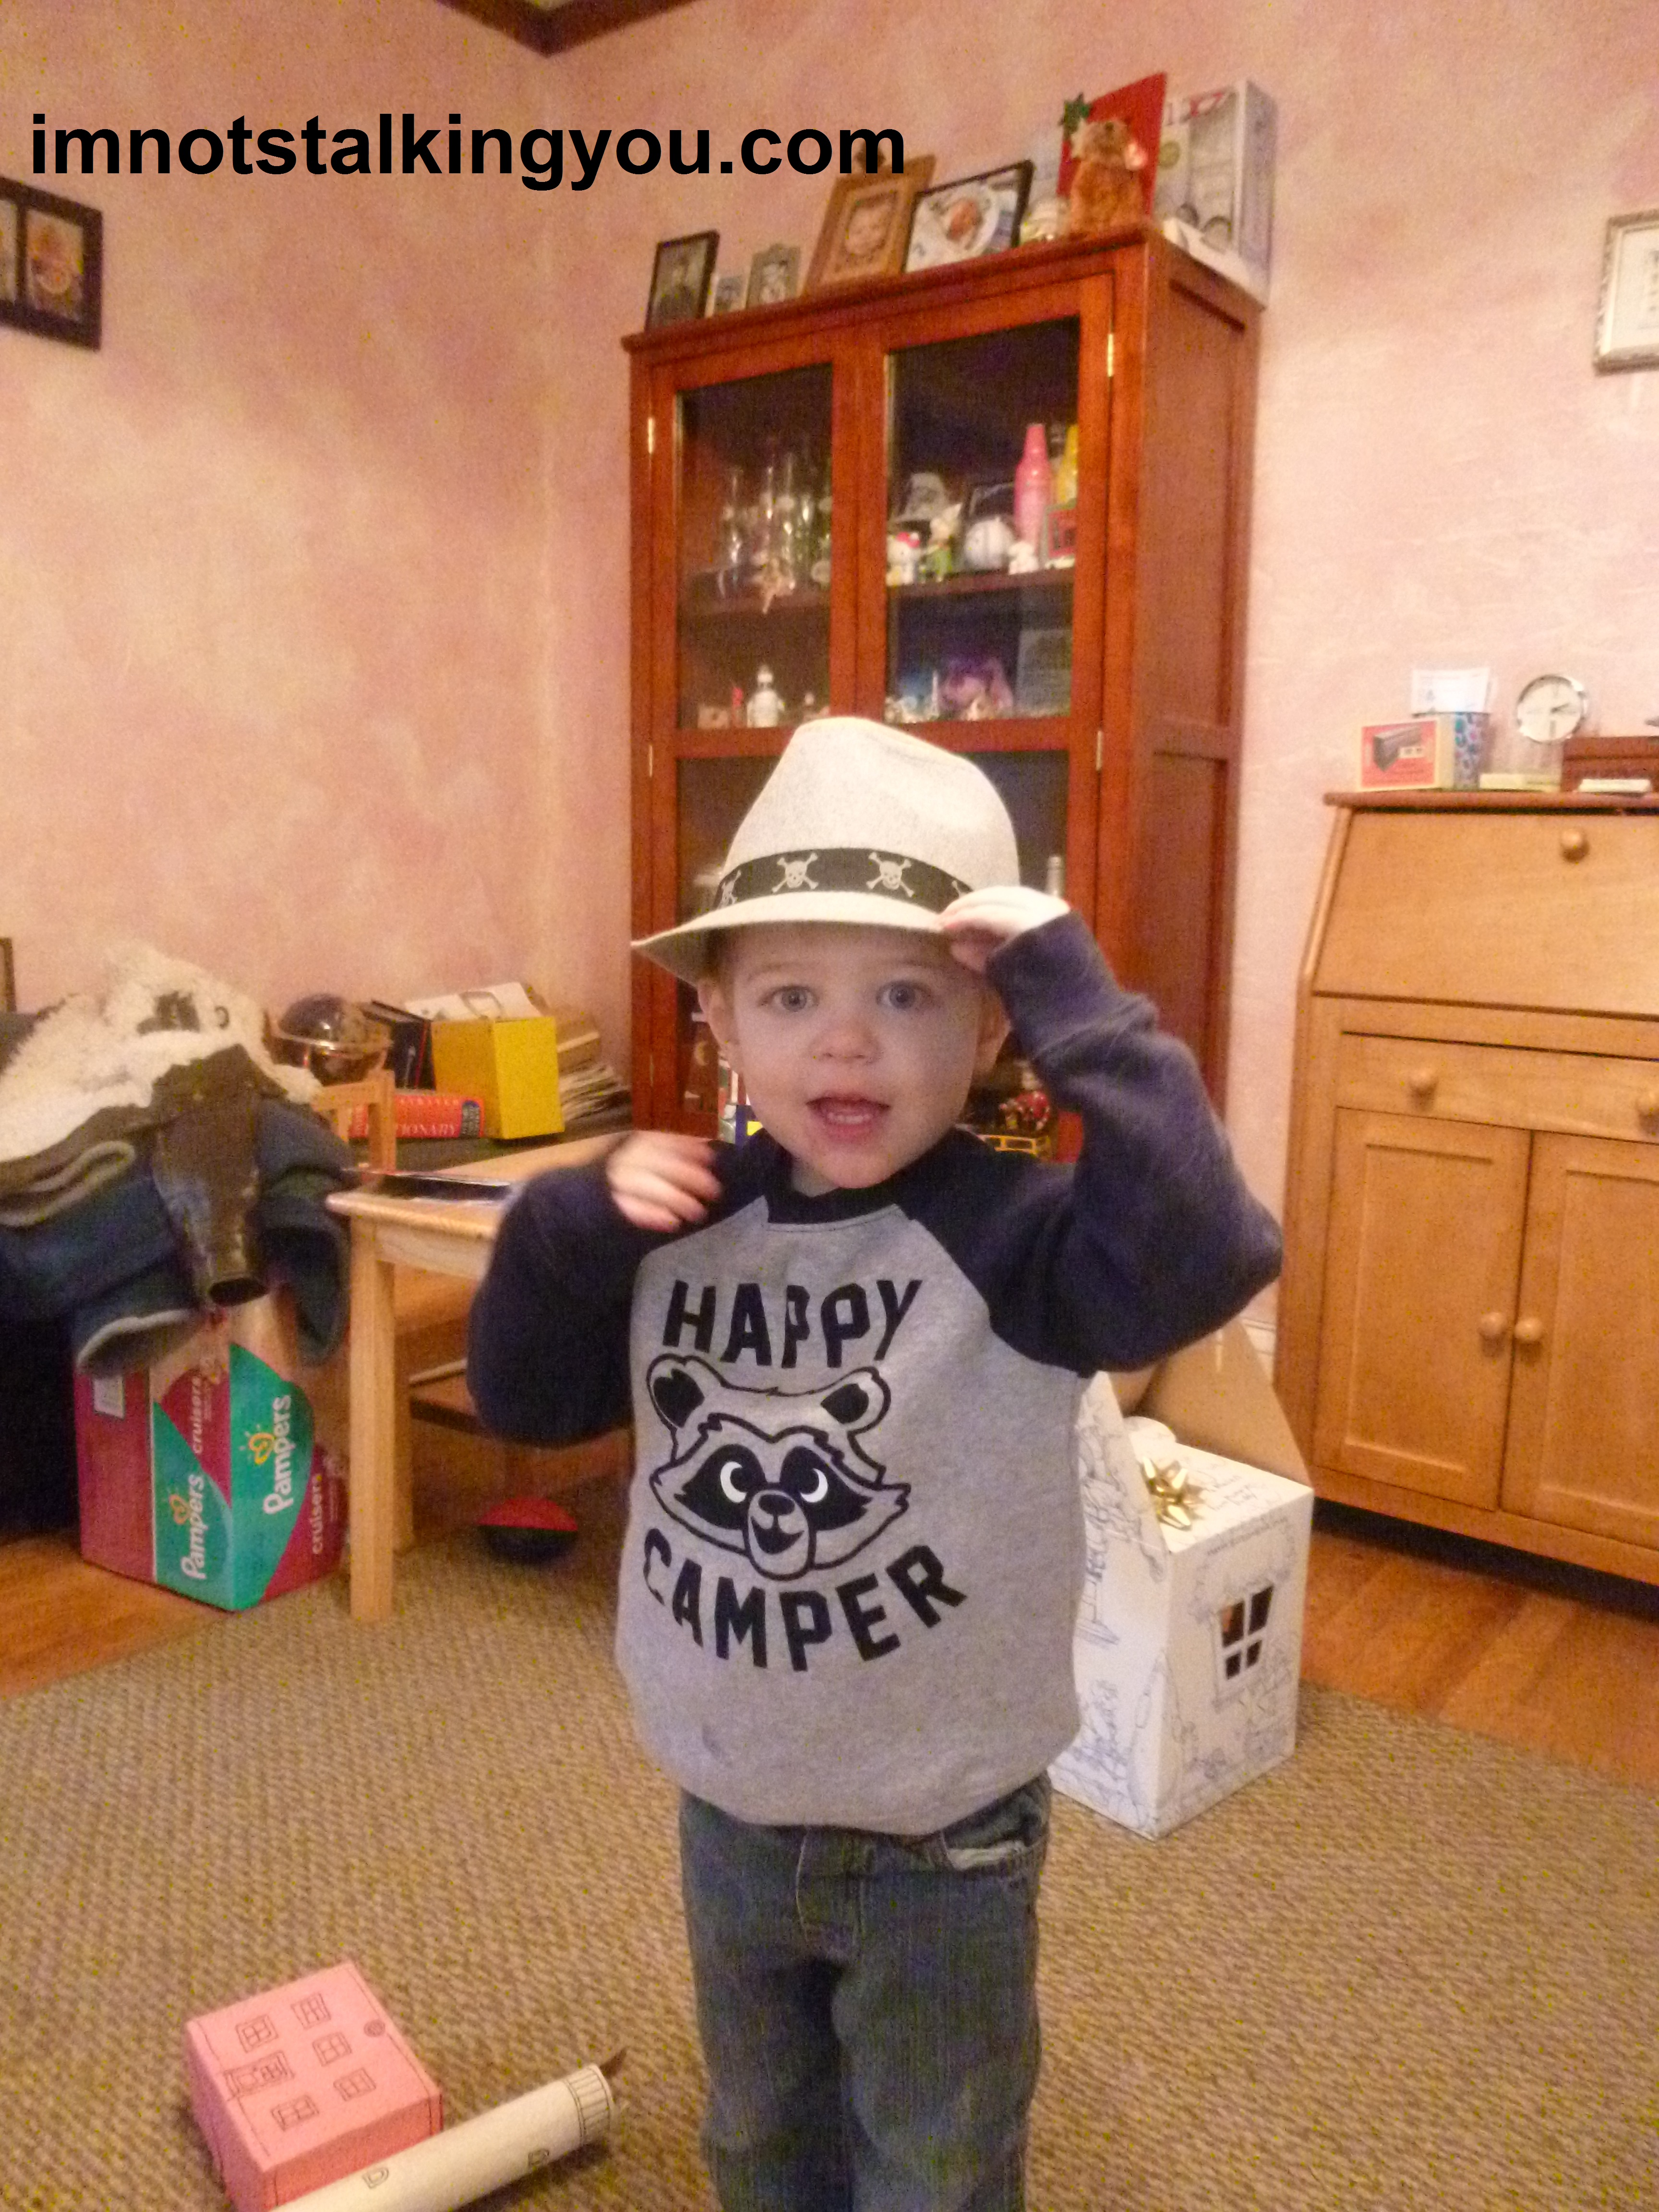
The ultimate test for me is if my son can tell what the cake is supposed to be. And he could!
Then he pointed out that there were only buffers on on end. And he wanted me to make the rest of the train cars 
I pretty much used the knowledge I gained from Thomas to make this cake.
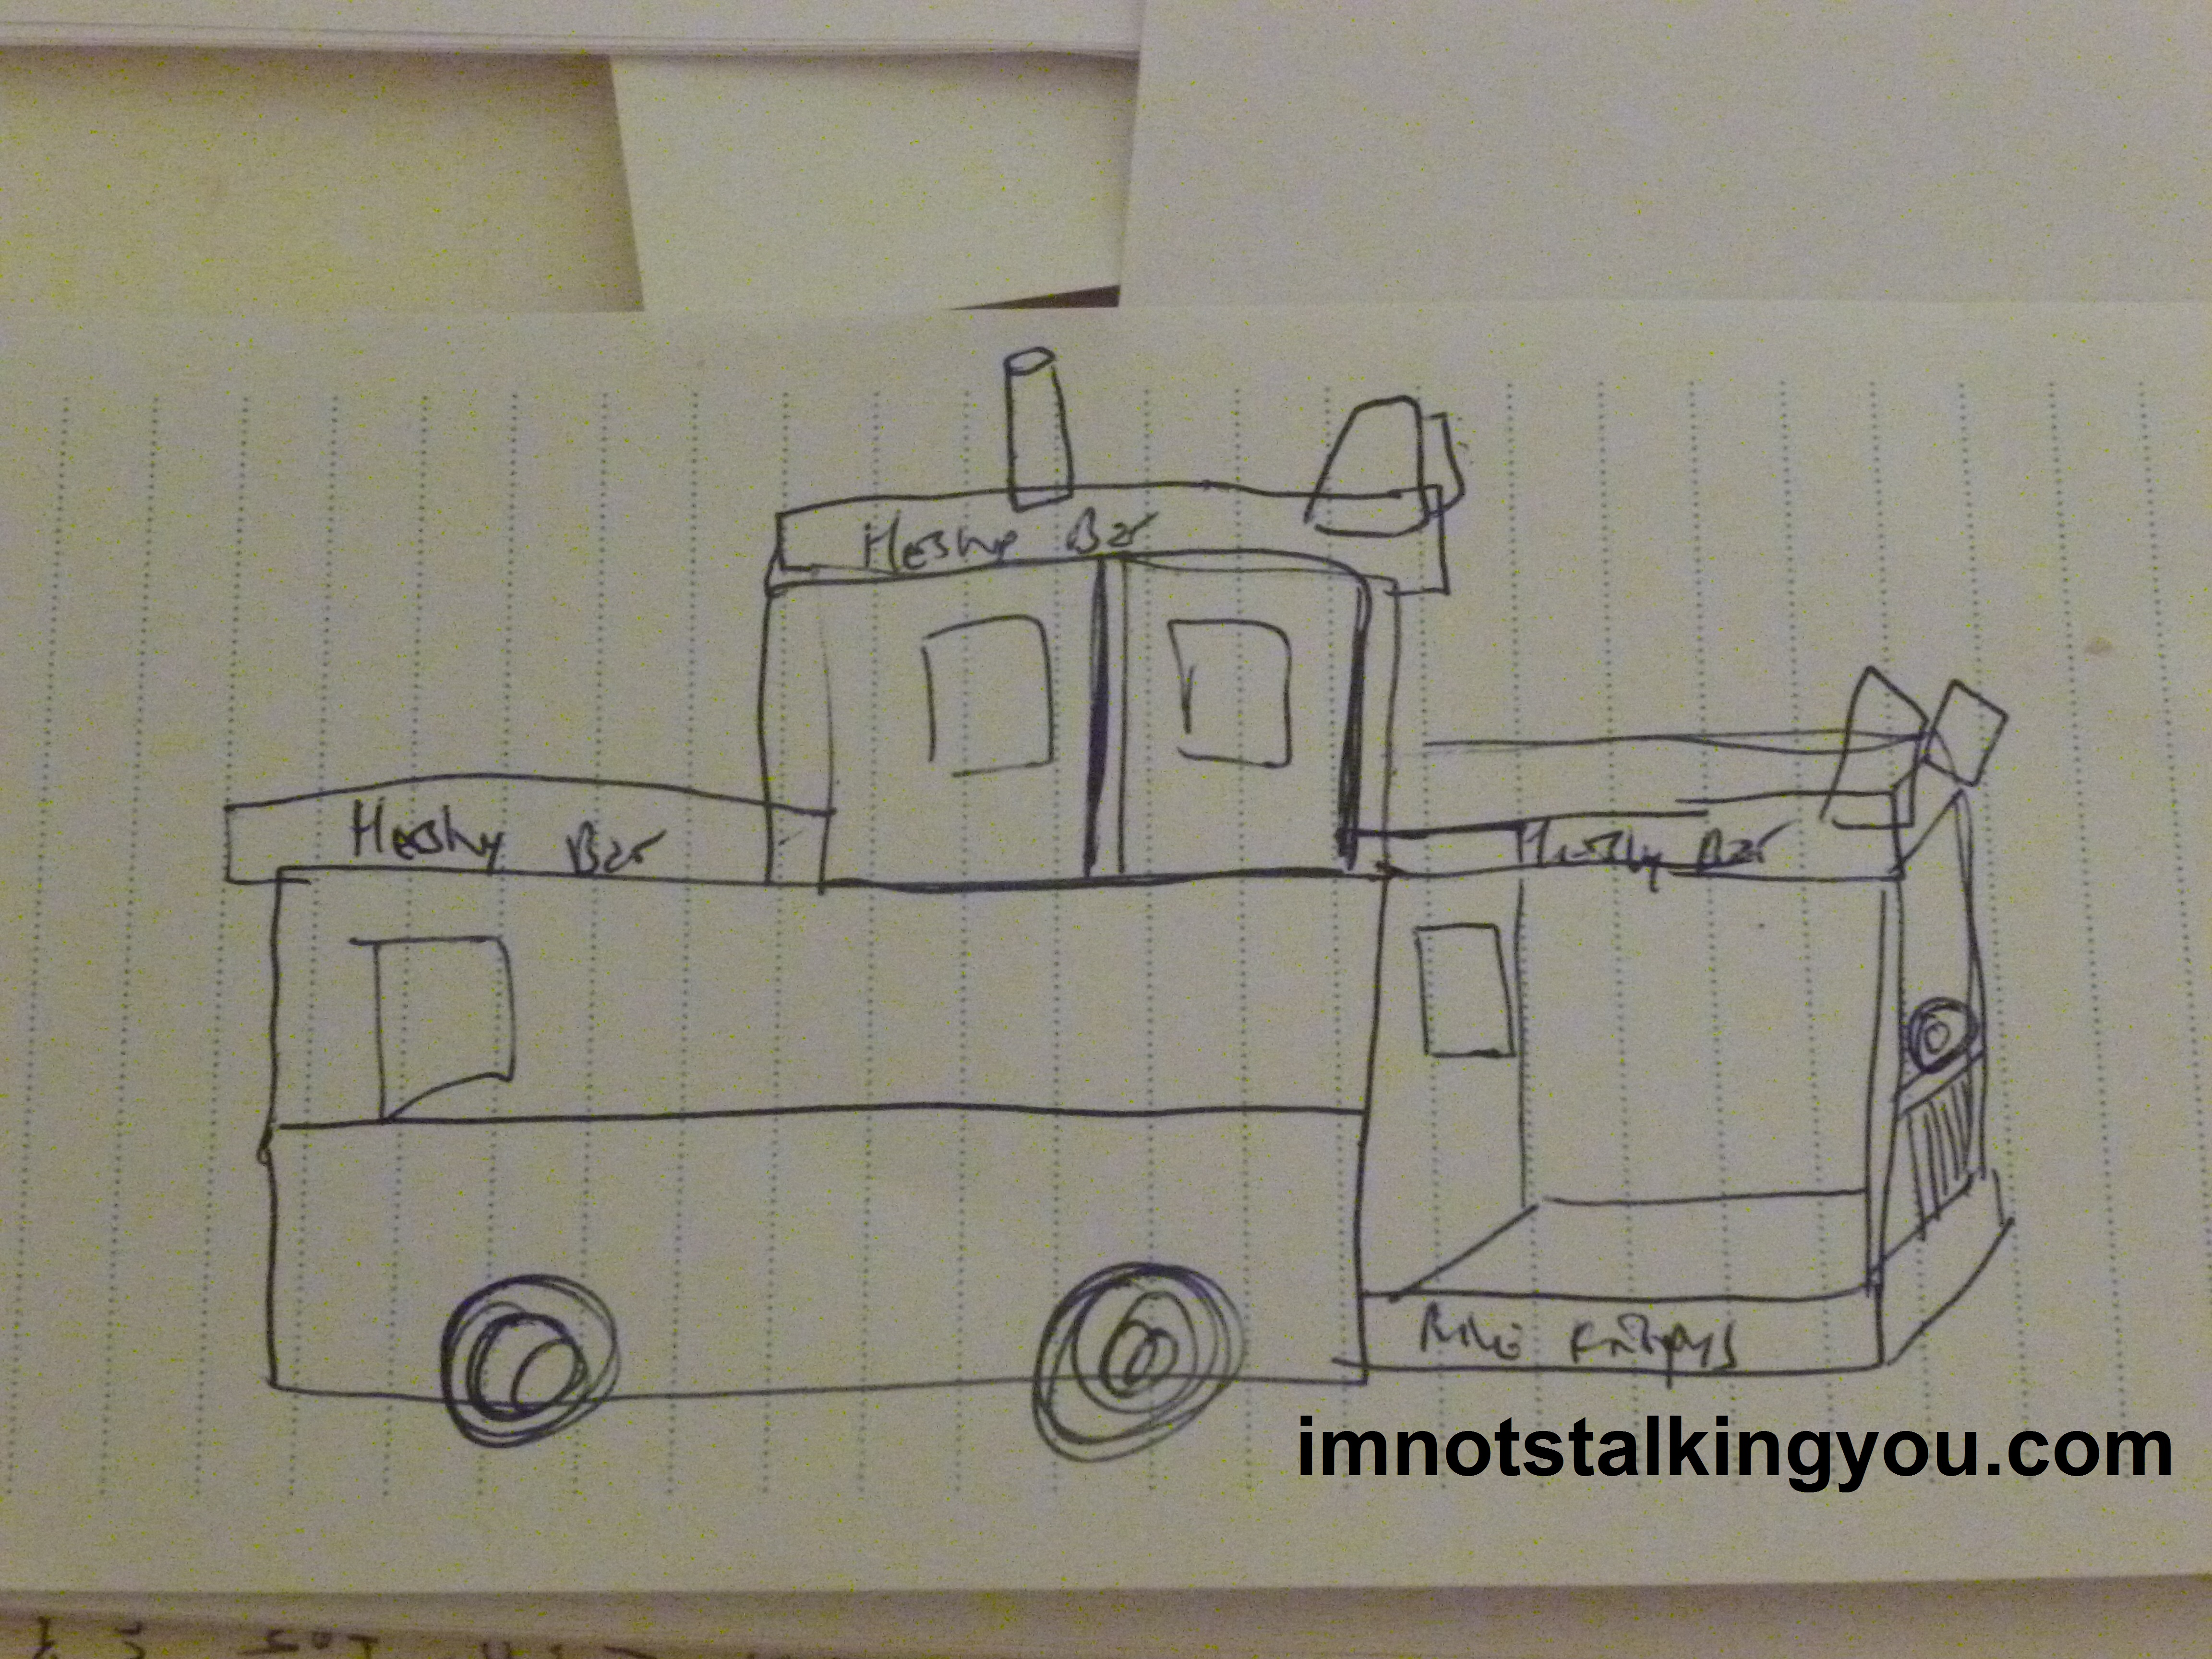
1. Draw picture.

Rough drawing (Click on any picture to make it larger)
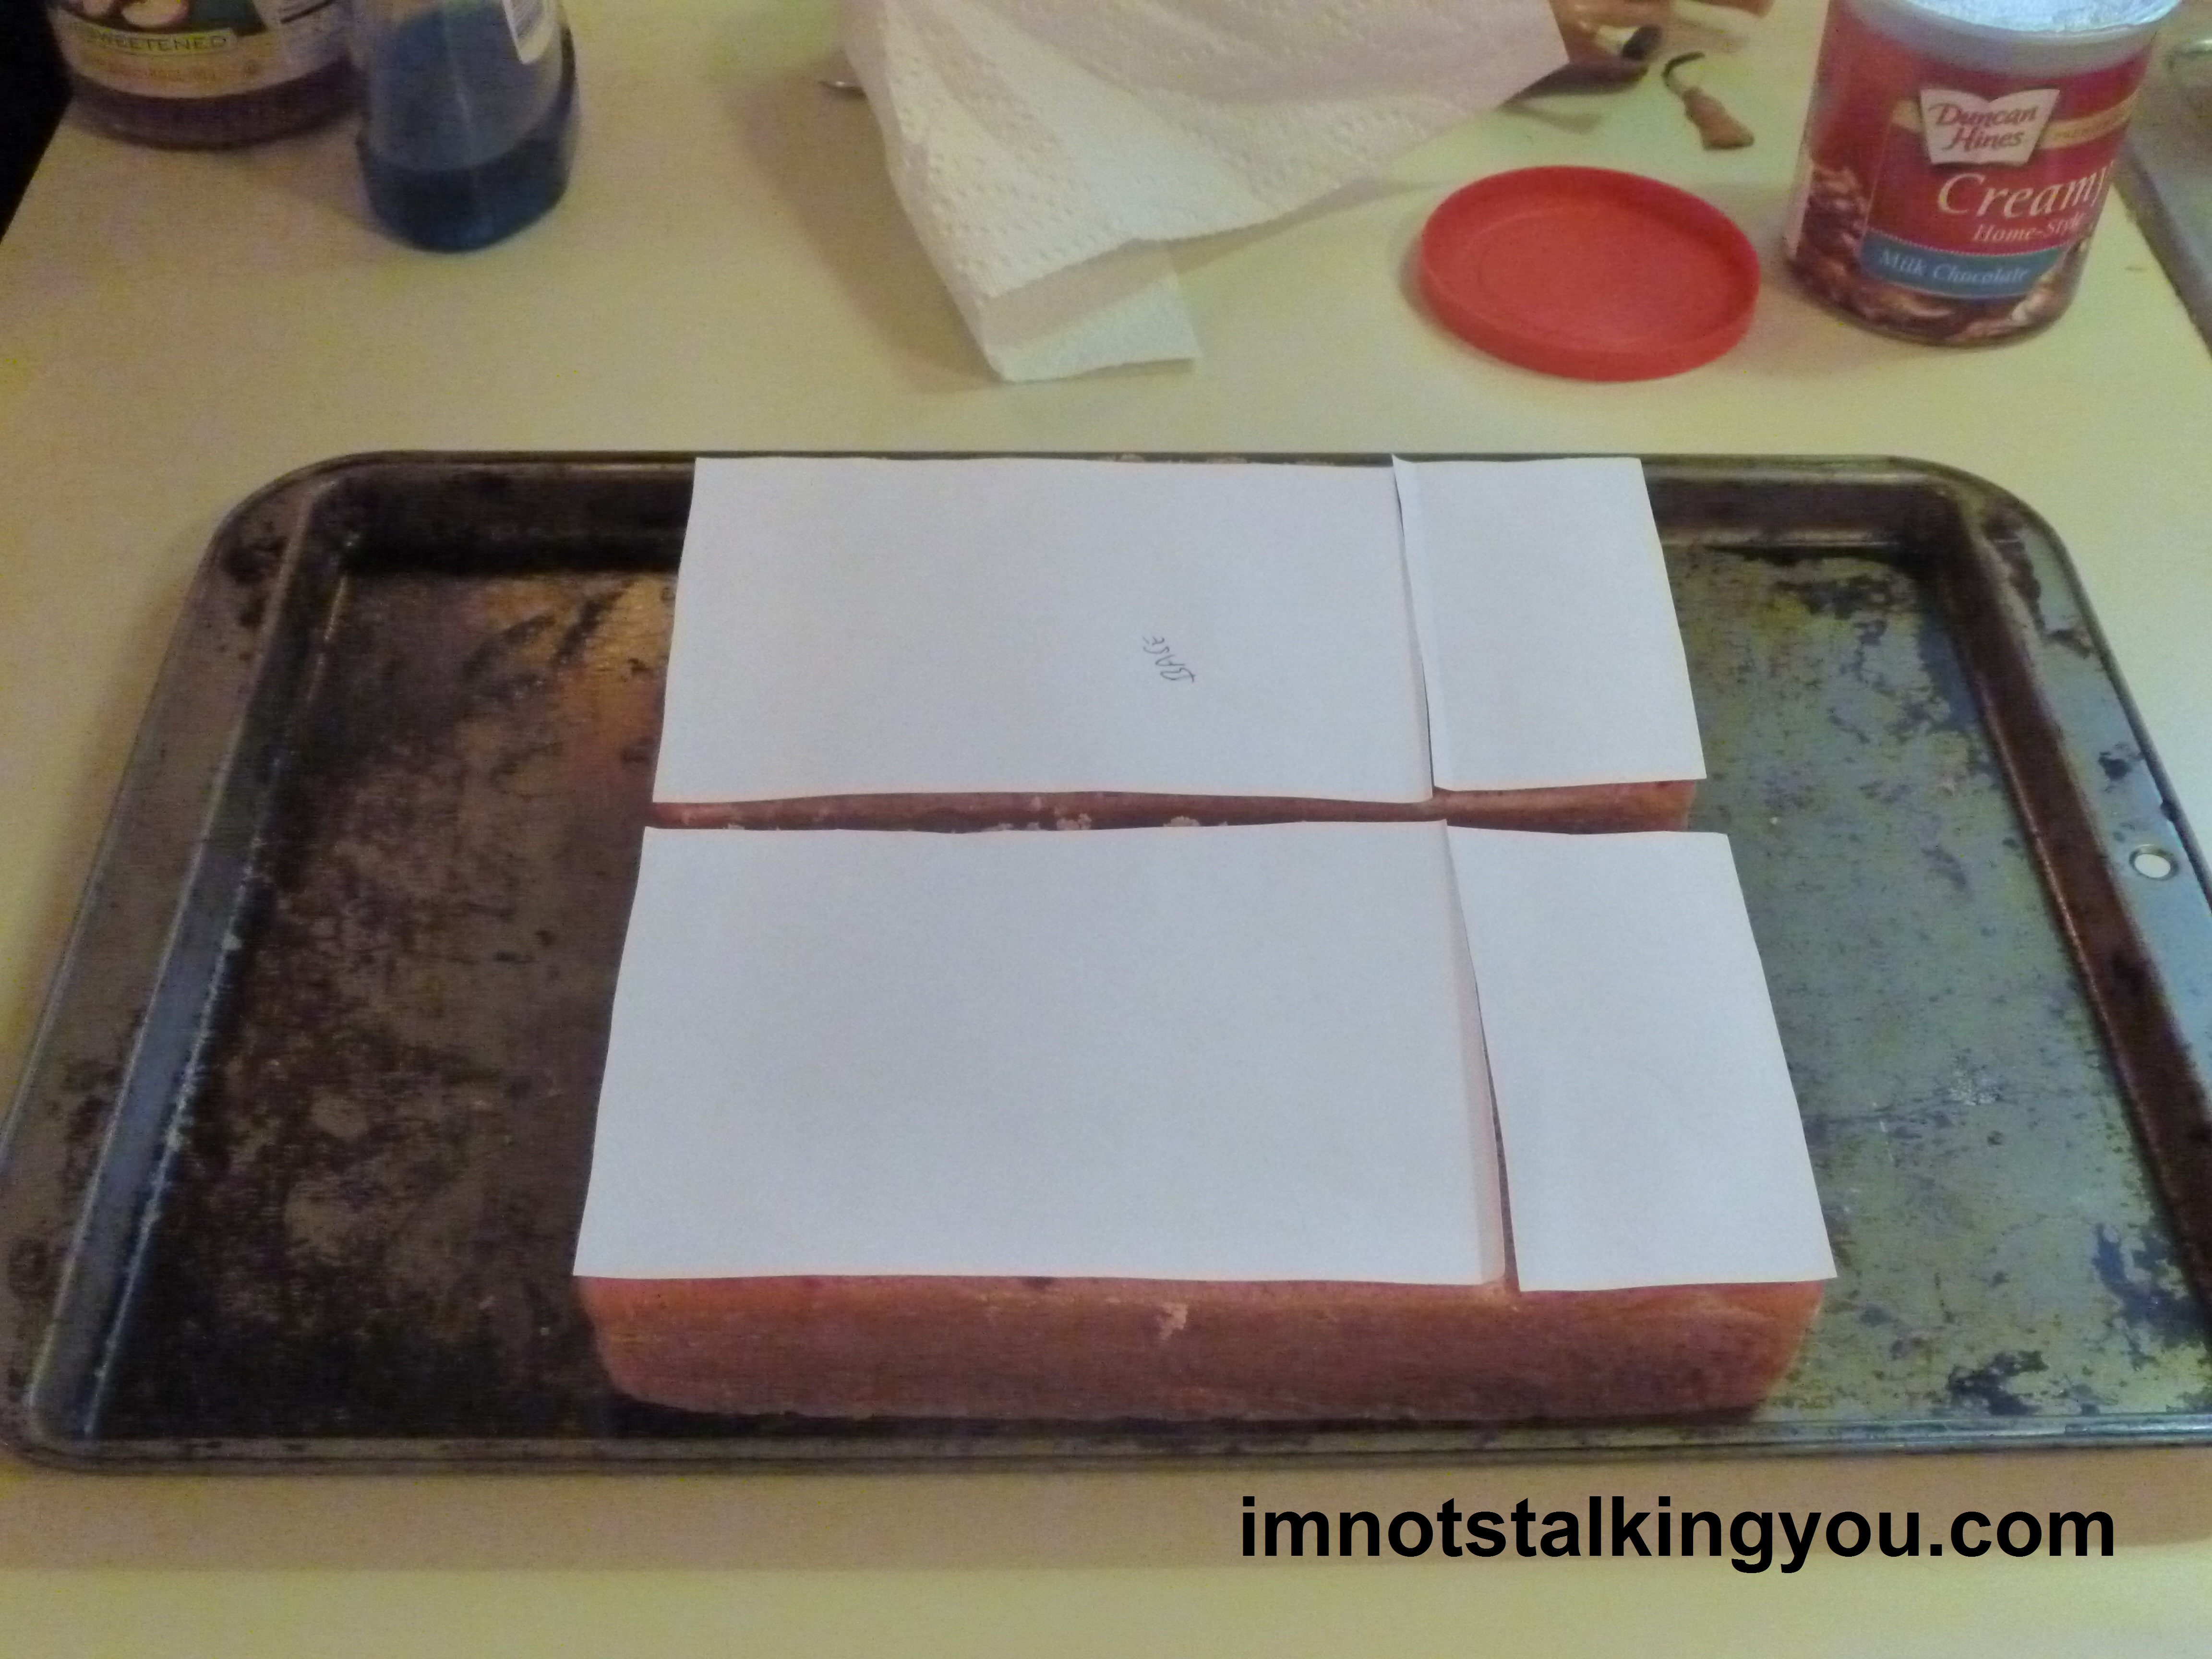
2. I used paper to create a template.
3. I baked and froze my cakes, wrapping them in wax paper and foil to prevent freezer burn. I used one box of cake mix and split it between 2 loaf pans. Note to Self: Level the cakes at this step next time.
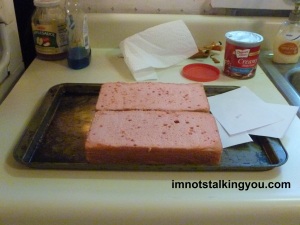
Frozen cakes
4. I took them out of the freezer and cut them according to the templates.

Frozen cakes with templates
5. I stacked them using frosting. (This is where I should have consulted my original drawing again. Whoops. You know what they say: Live and learn and eat a houseboat.) I slid two wooden dowels through the high part.
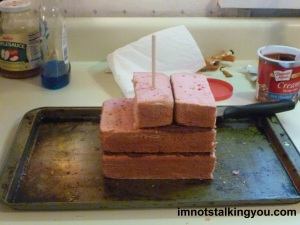
Stacked cakes with dowels
6. Frosted the outside.
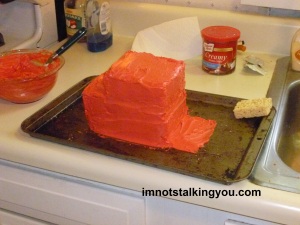
Covered in red frosting
7. Applied decorations. I used Hershey’s kisses for the wheels, fruit roll-ups for the windows, cinnamon discs for the lights, Rice Krispie treats for the back end, and a huge-ass Hershey bar for the roof. Most of the rest of the details are made out of licorice. Which you could not pay me to eat, but it proved to be a very versatile decorating tool. The railing was made with the help of paper sucker sticks and toothpicks (DO NOT EAT TOOTHPICKS!).

Constructing caboose details
8. I used chocolate frosting for the ground, brown sugar for the gravel/dirt, and licorice for the rails and ties. I wanted to have green frosting for grass, but I forgot and dyed all my frosting red.
*Moral of the story: Take your time! Do not rush!

Cake showing all details and tracks
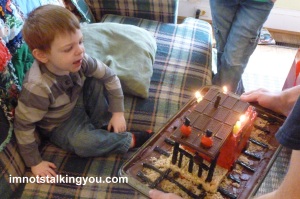
9. Apply dinosaur candles to instantly convert the caboose into one of my son’s other favorite entertainment franchises: Dinosaur Train!

Caboose with dinosaur candles inserted
10. Light candles.
11. Make wish.
12. Blow out flame.
13. Cut cake, removing all non-edible objects.
14. EAT!
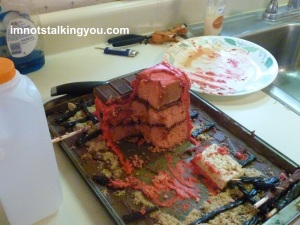
Destruction: The tastiest part of cake-baking
15. Re-light candles. Make more wishes.
Remember what my Thomas Cake post was titled?
“Beginner’s Luck”
Yep. This is what happens when beginner’s luck runs out.

The dashing birthday boy!